
Adding a WMTS Cascade Layer
WMTS cascading allows to expose layers coming from other WMTS servers as if they were local layers. This provides for some interesting advantages:
- Clients connecting to your SDI need to care about less points of origin, which might be important for high security networks
- It is now possible to ask for maps in formats not supported by the original server, or to reproject the maps in projections not supported by the original server (GeoServer supports out of the box almost 5000 different coordinate reference systems)
- It is now possible to mix the layers with local ones to generate print oriented formats such as PDF
- It is now possible to provide more informations about the layer, such as a better description, more keywords, which will benefit all clients, in particular catalogues harvesting informations from your capabilities document
To access a remote WMTS, it is necessary to load it as a store in GeoServer.
GeoServer must be able to access the capabilities document of the remote WMTS for the store to be successfully loaded.
Configuration
The configuration as usage of the cascaded layers follows GeoServer traditional ease of use.
Open the web browser and navigate to the GeoServer Welcome Page.
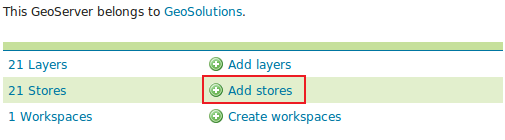
Select Add stores from the interface.
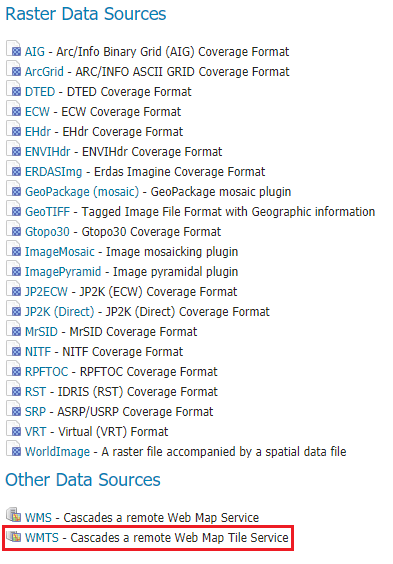
Select WMTS - Cascades a remote Web Map Service from the set of available Other Data Sources.
Specify a proper name (as an instance,
geoserver-stable-wmts) in the Data Source Name field of the interface.Specify
http://gs-stable.geo-solutions.it/geoserver/gwc/service/wmts?REQUEST=GetCapabilitiesas the URL of the sample data in the Capabilities URL field.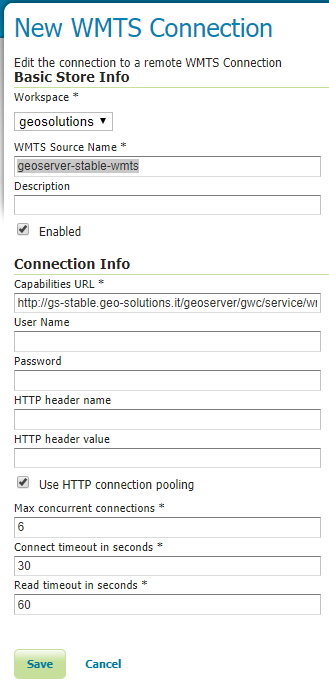
Click Save.
When properly loaded, all layers served by the external WMTS will be available to GeoServer. Before they can be served, however, they will need to be individually configured (published) as new layers. See the section on Layers for how to add and edit new layers. Once published, these layers will show up in the Layer Preview and as part of the WMS capabilities document. If the WMTS layer has additional dimensions (e.g. time), related info will be reported on the WMS capabilities as well.
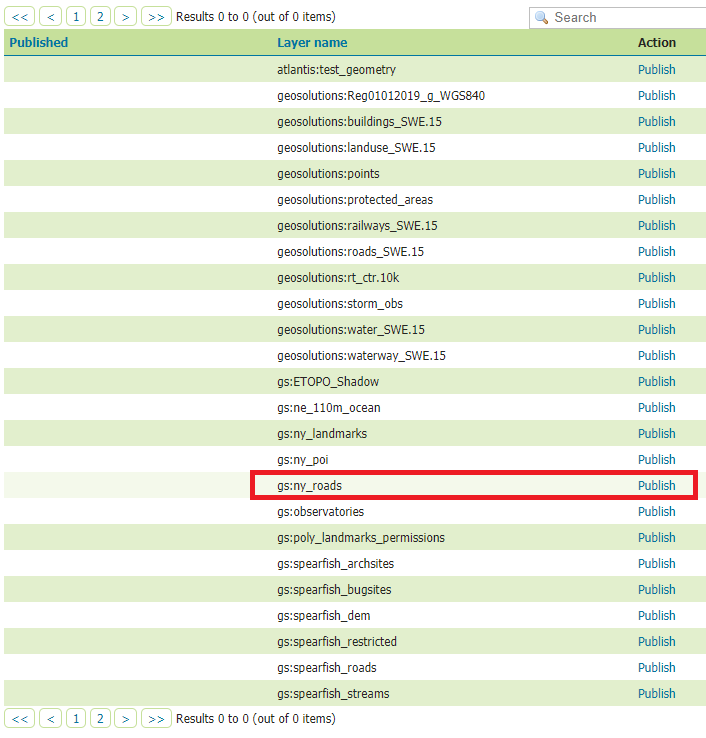
Publish the layer by clicking on the publish link near the gs:ny_roads layer name. Notice that you can also add more layers later.
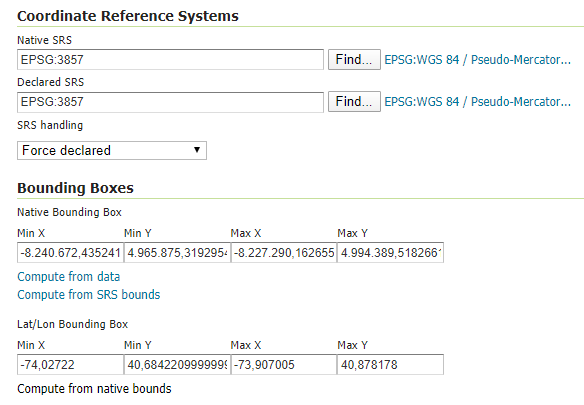
Check the Coordinate Reference Systems and the Bounding Boxes fields are properly set and click on Save.
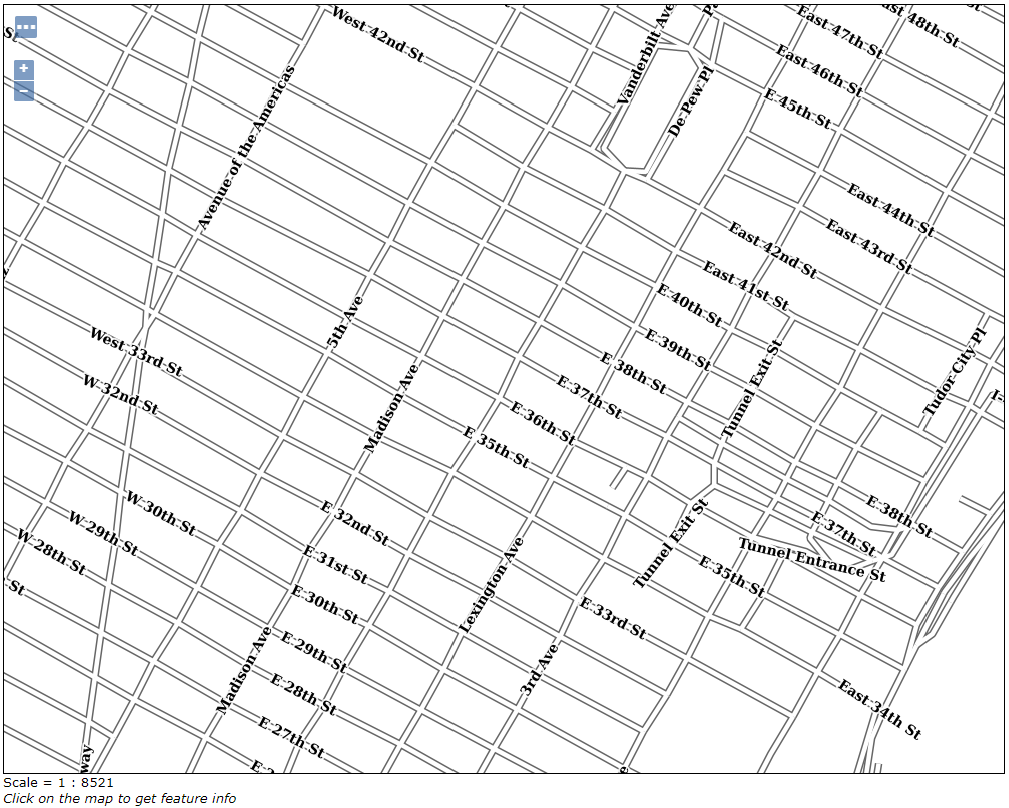
At this point the new WMTS Layer is being published with GeoServer. You can use the layer preview to inspect the data.
Limitations
Layers served through an external WMTS have some, but not all of the functionality of a local layer:
- Layers cannot be styled with SLD.
- GetFeatureInfo requests aren’t supported.
- GetLegendGraphic requests aren’t supported.
- Image format cannot be specified. GeoServer will attempt to request PNG images, and if that fails will use the remote server’s default image format.