
Importing source and target schemas
Schemas define the structure of the data both concretely (e.g. XML schema, database schema) and conceptually (description in terms of classes/types, properties and relations, e.g. UML). HALE’s main job is to abstract a conceptual schema from a concrete schema and to assist the user in mapping concepts from a source schema to a target schema.
In this training, source schemas will be inferred from a PostGIS database, while target schemas will be extracted from XSD files.
Importing the source schema
To import the source schema, follow these steps:
- Make sure the PostgreSQL server is running.
Note
If it’s not running, start it by double clicking on the start_postgis.bat batch script (windows) or type in the terminal sudo service postgresql start (linux).
Select File → Import → Source schema... from the menu bar on top.
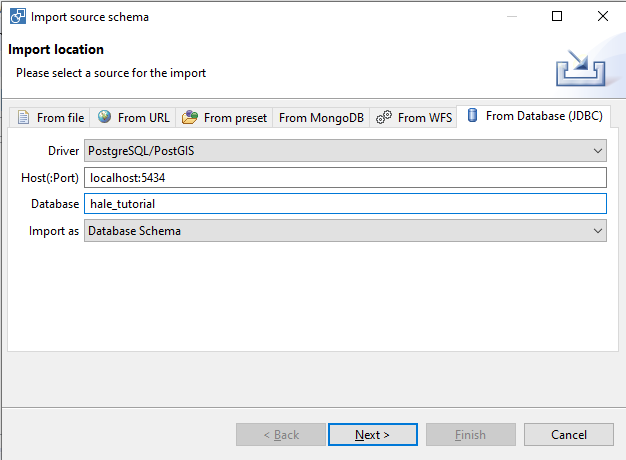
A wizard will open. On the first page of the wizard, click on the From Database (JDBC) tab and populate the form fields as shown in the figure below.
- Host(:Port): localhost:5434
- Database: hale_tutorial
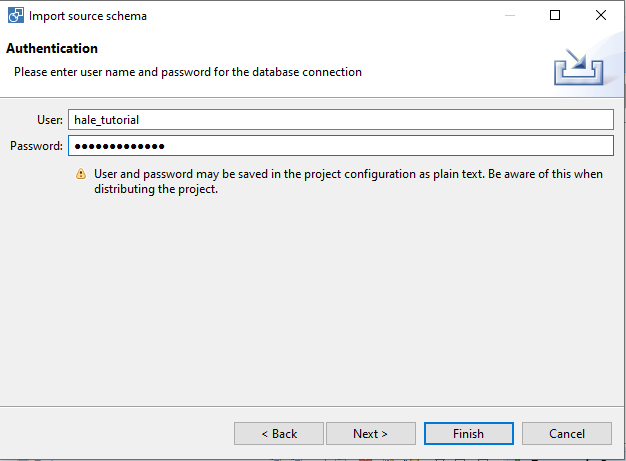
- The next page will ask you for credentials to access the database. Enter hale_tutorial as both User and Password.
- User: hale_tutorial
- Password: hale_tutorial
- After the schema has been imported, the Schema Explorer view should look like the figure below:
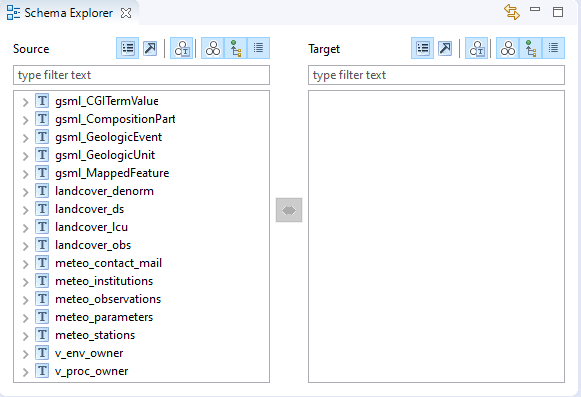
Note that HALE created a new type for each table in the database.
Not all source types are relevant for the mapping we want to create. Select Edit → Edit mapping relevant source types from the menu bar and uncheck the irrelevant types, as shown in the figure below.
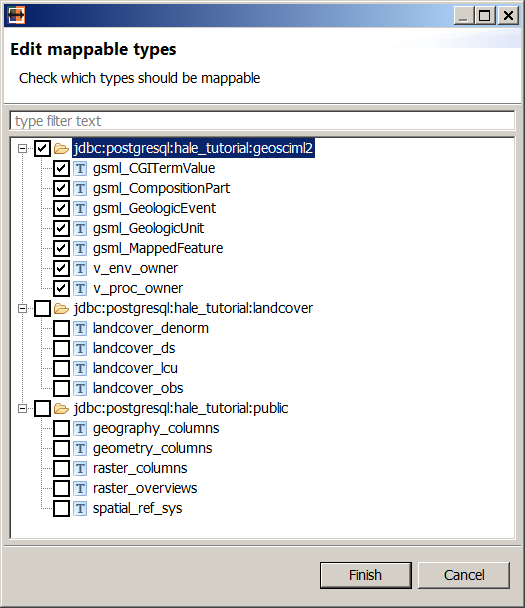
Click finish, and now the Source section in the Schema Explorer view should show only the selected types.
Importing the target schema
To import the target schema, follow these steps:
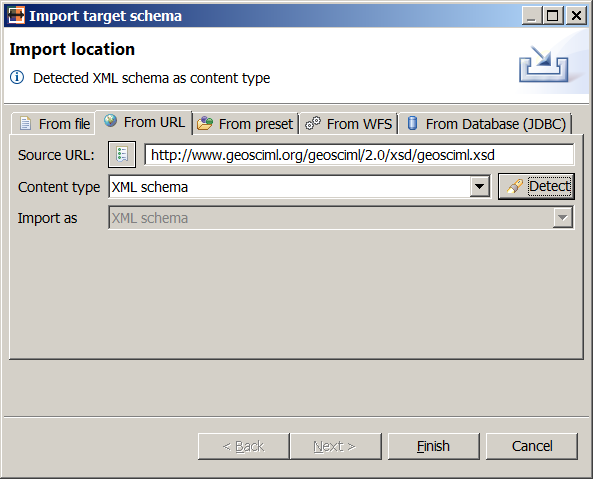
Select File → Import → Target schema... from the menu bar on top.
A wizard will open. On the first page of the wizard, click on the From URL tab, copy the URL http://www.geosciml.org/geosciml/2.0/xsd/geosciml.xsd in the Source URL field and click on the Detect button.
The Content type option should display XML schema. Click on the Finish button.
Note
This step requires internet connectivity.
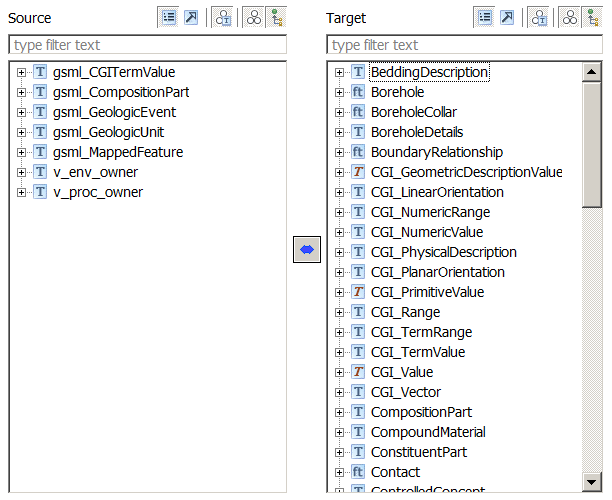
After the schema has been imported, the Schema Explorer view should look like the figure below.
Not all target types are relevant for the mapping we want to create. Select Edit → Edit mapping relevant target types from the menu bar and uncheck the irrelevant types, as shown in the figure below.
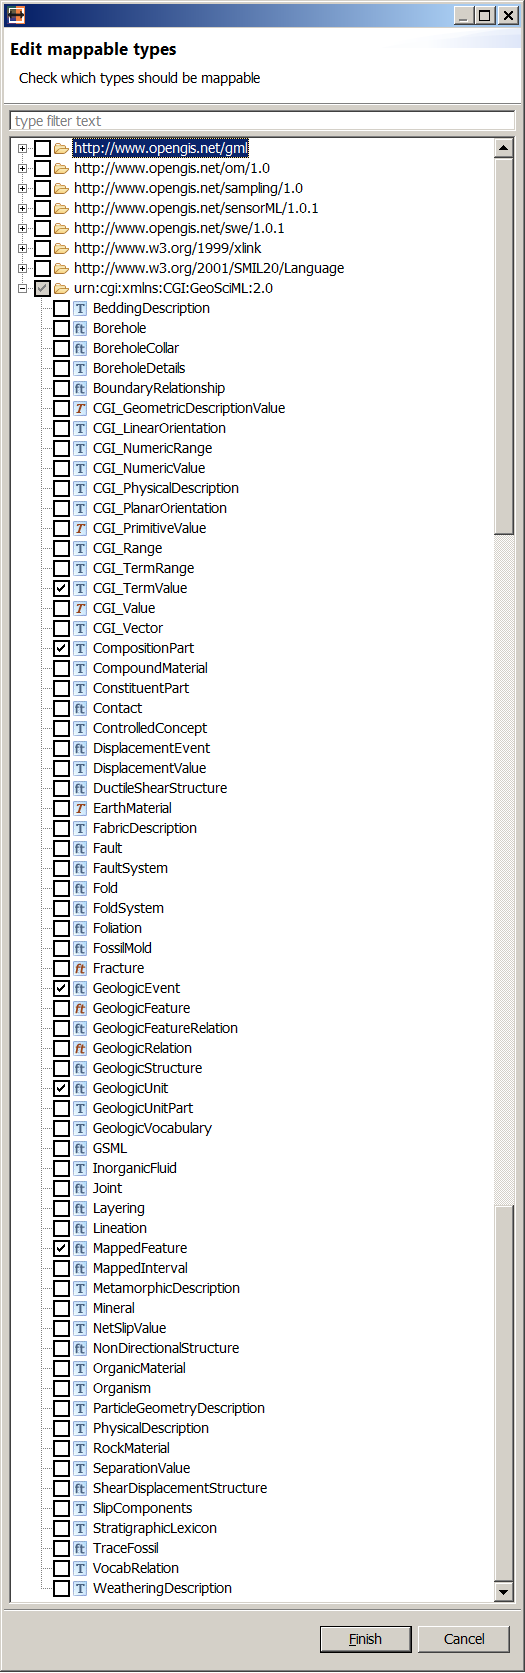
Click finish, and now the Target section in the Schema Explorer view should show only the selected types.