NetCDF output Format for WCS 2.0.1 requests
A NetCDF output format has been developed to write down a NetCDF file with the proper contents coming from a multidimensional output request.
When requesting a multidimensional coverage, GeoServer will check whether the requested format does support a multidimensional output. In that case it internally splits the request into multiple 2D requests and put all the results into a GranuleStack which is a stack of returned coverages each one with the specific subset of dimension value identifying it. Then the format writer will setup the proper data structure on top of the provided dimensions and data.
On this section we will do a GetCoverage request involving trimming on these dimensions: latitude, longitude, elevation and time, by specifying these ranges of values:
- Trimming on latitude [40 -> 50]
- Trimming on longitude [5 -> 20]
- Trimming on elevation [300 -> 1250]
- Trimming on time [2013-03-01T10:00:00.000Z -> 2013-03-01T22:00:00.000Z]
GetCoverage request using KVP encoding
Paste the following link on the browser to send a getCoverage request asking for a NetCDF output containing the granules for the specified dimensions.
http://localhost:8083/geoserver/wcs?request=GetCoverage&service=WCS&version=2.0.1&coverageId=geosolutions__testNetCDF&Format=application/x-netcdf&subset=http://www.opengis.net/def/axis/OGC/0/elevation(300,1250)
GetCoverage request using CURL
Open the Terminal and enter the following command:
curl -v -u admin:Geos -XPOST -H "Content-type: text/xml" -d @%TRAINING_ROOT%/requests/polyphemus_wcs_request.xml "http://localhost:8083/geoserver/wcs" > geosolutions__testNetCDF.nc

.. note:: Remember to change the value of %TRAINING_ROOT% with your path to this training material.
Seeing results on Panoply
- Once the file has been saved to disk, navigate to the %TRAINING_ROOT%/Panoply.bat file and run it.
Panoply is a tool developed by NASA Goddard Institute for Space Studies, which allows to plot grids from NetCDF, GRIB and HDF datasets.
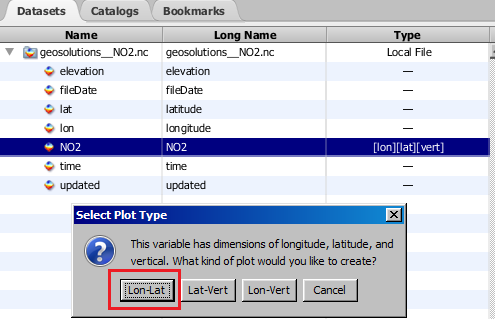
- Open the newly downloaded
geosolutions__testNetCDF.ncon Panoply. You will see the list of available variables in the Datasets Tab. As seen in the previous sections of the training, variables are used to store actual geophysic values as well as coordinates of the dimensions referring the geophysics. Variables related to geophysic coverages will also have a dimension list reported on the Type column of the dataset table.

- Open the newly downloaded
Double click on the dataset and push on the lon-lat button.
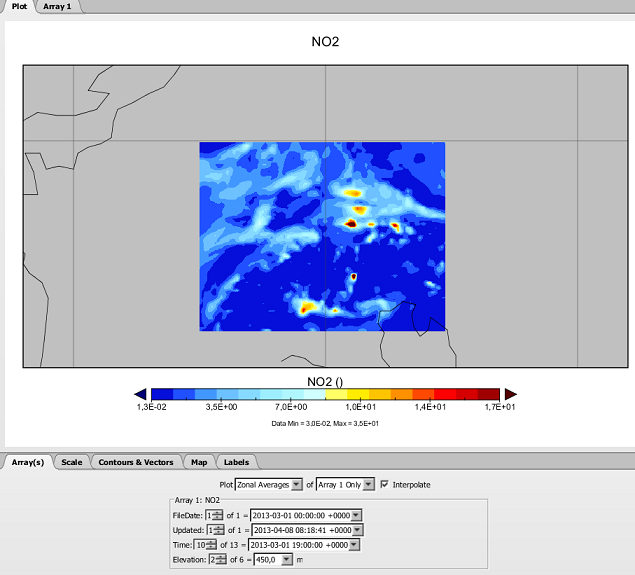
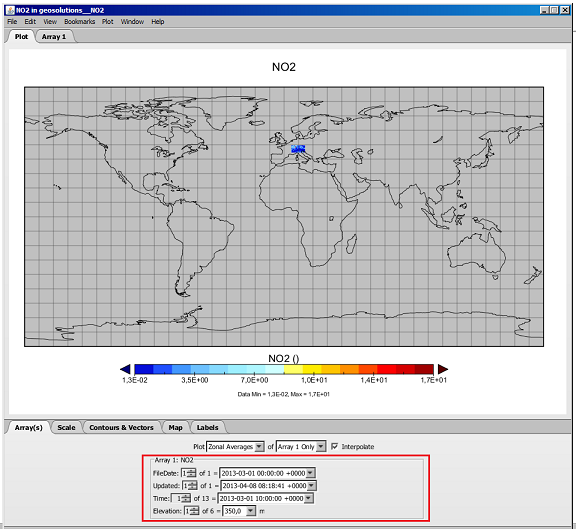
You will see a map rendering the variable for a specific set of Time, Elevation, Updated and FileDate dimensions values as reported in the bottom section of the interface.
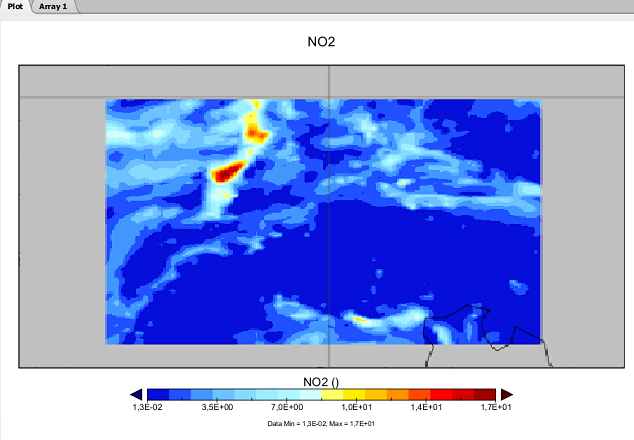
As you can see, the image is really small so we can center it on the window. Hold the CTRL key and draw a rectangle along the area you want to zoom in, by keeping pressed the left button of the mouse (release the mouse button when done).
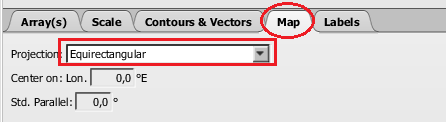
Alternatively, you can customize your area of interest by specifying the coordinates. Switch to the Map tab and change the Projection from the drop down list switching from Equirectangular to Equirectangular (Regional).
Adjust the region to see a bigger image by setting these values in the proper text boxes:
- Center on Lon = 10
- Lat = 48
- Width = 24
- Height = 8

Now, you can switch back to the Array(s) tab which also allows you to change the values of each dimension to see the related data.
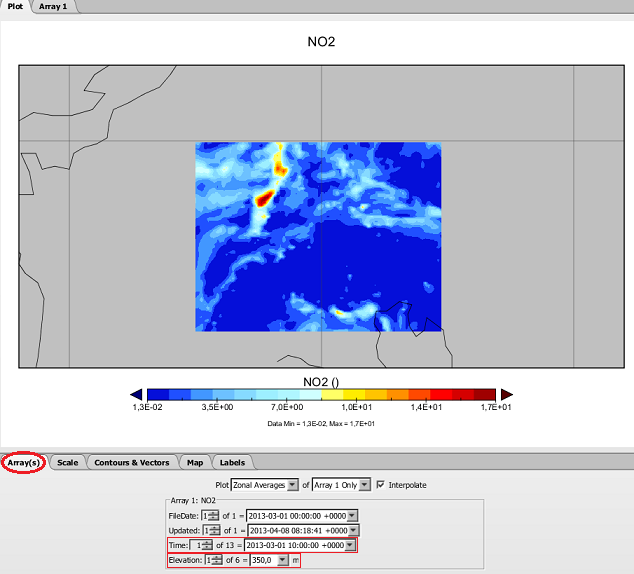
Try to change the time and/or the elevation values and you will see the updated data.