
Vector Data dimensions
Overview
This chapter introduce the concepts of TIME and ELEVATION dimensions related to Vector datasets in GeoServer.
In the following sections we are going to see how to load a shapefile containing valid time and elevations attributes and how to configure these dimensions in Geoserver.
Time and Elevation dimensions
All vector data formats are composed of many features. A feature is a record on a database table that is spatially localizable. A feature, as a normal database record, is composed of many attributes, often one or many of them can be geometry attributes.
It’s easy to guess how the TIME and ELEVATION dimensions can be implemented for a generic vector dataset: just use a Date and a Numeric attribute to store the time and elevation values but, which dataformat that fields should have?
- An elevation attribute can be modelled as an integer attribute as well as a float attribute, both can be reasonable choices.
- A time attribute can be modelled with a format that supports both date and time, or only the date or only the time.
GeoServer doesn’t impose any limitation on the person who is in charge to model the dataset rather allows him to easily configure these parameters through its GUI.
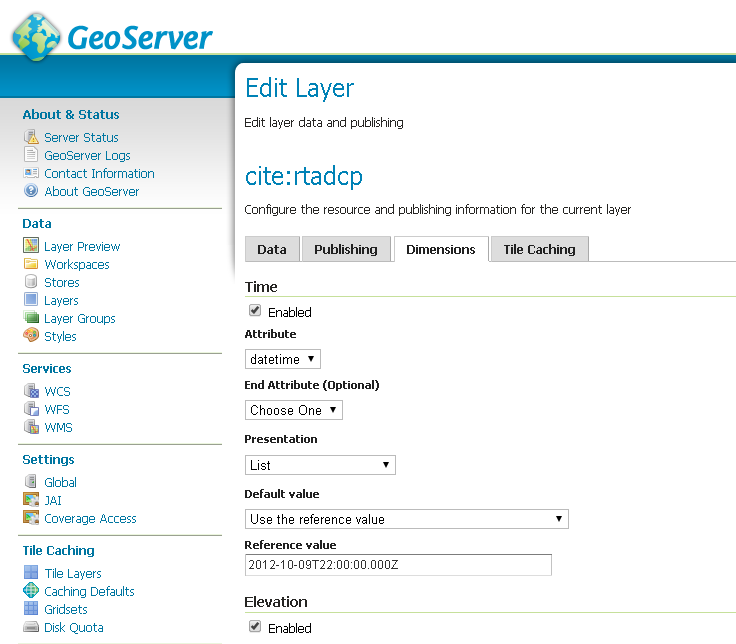
Overview of the GeoServer GUI Dimensions tab
Dataset description
In this training a dataset representing undersea marine informations gathered by marine probes will be used .
Each feature is composed of several attributes including a field related to the time of the acquisition (TIME) and a field related to the depth of the acquisition (ELEVATION).
The vector format used is the shapefile. Anyway all the considerations and all the configurations which will be discussed here can be applied to any other type of vector datastores.
Load a shapefile with time and elevation dimensions
The first step to do is a quite common task: load a shapefile into geoserver.
- Locate the rtadcp.shp file into the folder
$TRAINING_ROOT\data\user_data\multidim\shp\and load it as a shapefile datastore (%TRAINING_ROOT% in Windows).
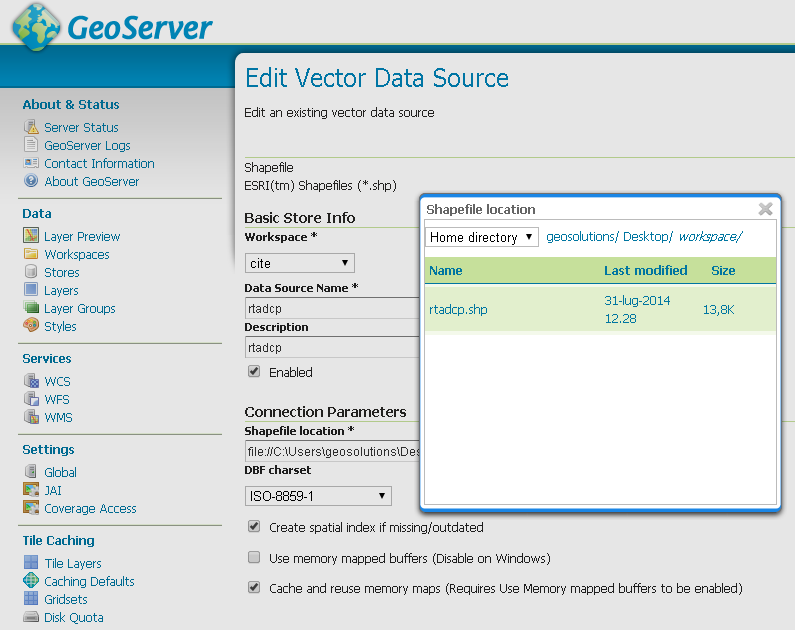
Shapefile loading
The publish datastore workflow lead the user directly in the publish layer section.
- In the Data tab Compute the Bounding Box if it isn’t automatically computed and then switch to the Dimensions tab.
- The Dimensions tab is where all the TIME and ELEVATION configurations must be defined, fill-in the form as shown in the screenshoot below.
In particular:
- Choose the time attribute to be
datetime, with list presentation, and reference value set to2012-10-10T00:00:00.000Z - Choose the elevation attribute to be
depth, with list presentation, and as default value set toUse the smallest domain value
- Choose the time attribute to be
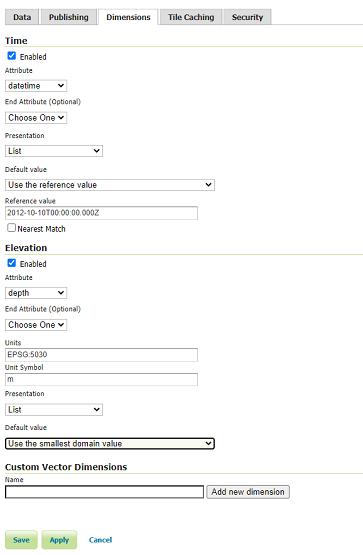
Dimensions for filled-in with the tutorial example settings
Next section explains the meaning of all the fields and the further one will show some layer visualization examples using Geoserver OpenLayer preview.
Dimensions configuration explanation
The two sections have some common attributes name: Attribute, End Attribute, Presentation, Default value. The meaning of these attributes is similar between both dimensions:
Attribute: Sets the feature attribute to use as the information field to retrieve the TIME and ELEVATION information.
End Attribute: Since Geoserver supports also ranges of TIME and ELEVATION, this option allows to specify the upper end range value. This is an optional attribute, when it is specified, the value of Attribute is taken as the lower end range value.
Presentation: Specifies how to handle the set of dimension values:
- List - handles the values as a list of all available values. When a dimension is set in the request, Geoserver searches for an exact match between the values available in the list.
- Continuous interval - handles the values as a continuous interval between the lower value (e.g. the lower TIME value or the lower ELEVATION value) and the higher value.
- Interval and resolution - same as Continuous interval plus the possibility to specify an interval resolution.
Default value: The default value used for dimensions params when no explicit values are provided.
- Use the smallest domain value - GeoServer uses by default the lowest TIME or ELEVATION value.
- Use the biggest domain value - GeoServer uses by default the higher TIME or ELEVATION value.
- Use the reference value - specify a reference value to use by default.
- Use domain value nearest the reference value - search for the nearest value to the reference value, instead of looking for an exact match between the reference value and an existing values.
- Use the built-in method to select the value - this method is available for backwards capabilities.
A glance on the WMS Capabilities Document
Depending on how the presentation field is set, the capabilities document will change its content in order to describe properly the layers properties.
- From the GeoServer HomePage, open the WMS 1.3.0 capability document clicking on the link
1.3.0located under the WMS label on the right-most column. - Search for the layer name rtadcp.
When Presentation is set to List, all times and elevations are listed:
<Dimension name="time" default="2012-10-10T00:00:00Z" units="ISO8601">
  2012-10-10T00:00:00.000Z,2012-10-12T00:00:00.000Z,2012-10-13T00:00:00.000Z
</Dimension>
<Dimension name="elevation" default="49.44" units="EPSG:5030" unitSymbol="m">
  49.44,49.45,81.44,81.45,113.44,113.45,145.44,145.45,177.44,177.45,209.44,209.45,241.44, ...
</Dimension>
When Presentation is set to Continuous interval, only the start and end elements of the interval are listed:
<Dimension name="time" default="2012-10-10T00:00:00Z" units="ISO8601">
   2012-10-10T00:00:00.000Z/2012-10-13T00:00:00.000Z/PT1S
</Dimension>
<Dimension name="elevation" default="49.44" units="EPSG:5030" unitSymbol="m">
   49.44/1265.47/0
</Dimension>
Warning
Setting dimensions to continuous interval allows the client to request any value between the begin and end, but the WMS will respond only if exact values are met, unless nearest match is supported and enabled by that dimension. If nearest match is unavailable, use this approach only if the client has some other means to figure out what the dimension values are.
Setting the presentation to Interval and resolutions allows the user to specify the resolution of the interval:
<Dimension name="time" default="2012-10-10T00:00:00Z" units="ISO8601">
  2012-10-10T00:00:00.000Z/2012-10-13T00:00:00.000Z/P1D
</Dimension>
<Dimension name="elevation" default="49.44" units="EPSG:5030" unitSymbol="m">
  49.44/1265.47/0.1
</Dimension>
Warning
Setting dimensions to Interval and resolutions allows the client to request any discrete value between the beginning and end, at the specified resolution, but the WMS will respond only if exact values are met, unless nearest match is supported and enabled on that dimension. If nearest match is unavailable, use this approach only if the dimension domain is truly regular and complete. In the above example, rtadcp is actually missing one of the days and does not have most of the elevation values found between 49.44 and 1265.47 at steps of 0.1m .
Playing with GeoServer OpenLayer preview
Open the GeoServer layer preview and visualize the preview for the layer rtadcp.
Since no TIME nor ELEVATION params are specified in the request, the reference values set previously will be taken as the values to use.
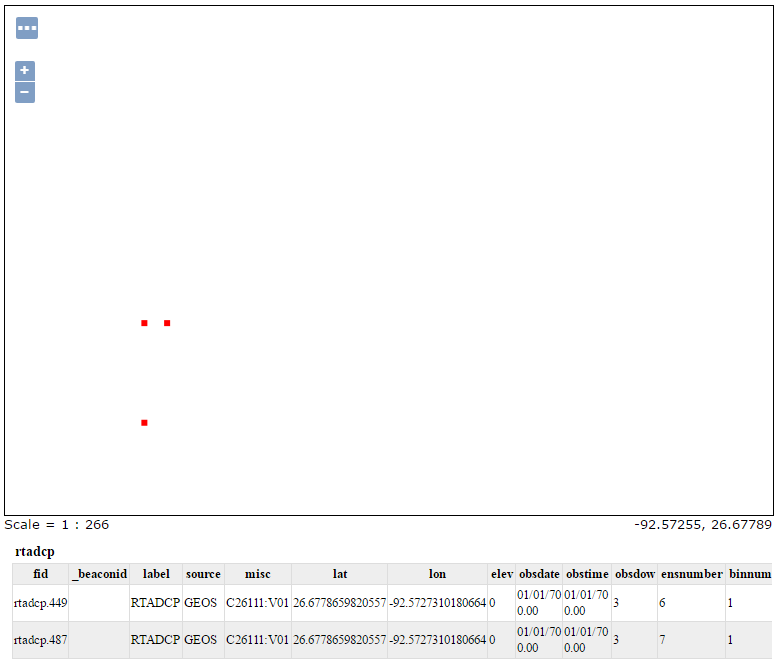
Layer preview using defaults TIME and ELEVATION.
Click on each single point on the map to look at the feature info. All the points in the map have the fields datetime and depth, which are associated to the TIME and ELEVATION dimensions, set as the reference values.
Note that there are more than 3 points on the map since many of them are overlapped.
Add the following string to the end of the layer preview URL:
&time=2012-10-13T00:00:00.000Z&elevation=1233.47
It will be shown only the point at datetime (a.k.a. TIME)
2012-10-12T22:00:00.000Zand depth (a.k.a. ELEVATION)1233.47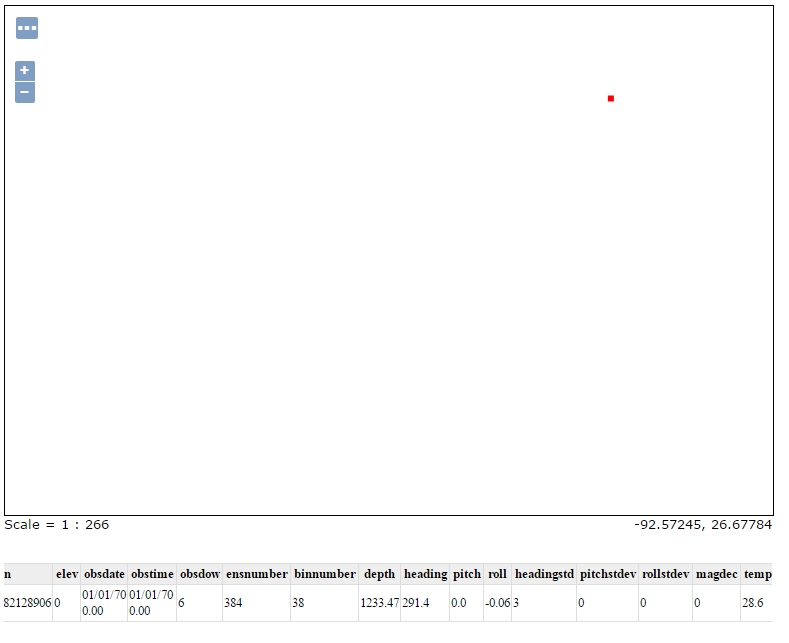
Layer preview specifying the TIME and ELEVATION dimensions