
Compression and Tiling
The following section explains how to improve the GeoServer performances with the optimization of raster files.
Basic optimizations have been already been discussed in the Introduction To Processing With GDAL section, describing the most common techniques used.
In this chapter we are going to learn more about compression and tiling techniques.
Compression
It is the process of making data more compact, with the final purpose to have data occupying less disk space. The main benefits of this process are:
- file size reduction
- improvement of performance over a network
But you need to remember that compressed data has to be decompressed to display in GIS application.
The amount of degree of reduction of the image’s file size is called compression ratio:
CR = Original Image Size / Compressed Image Size
For example if the size of the original image is 15MB and the size of the compressed image is 3MB. the compresso ratio is 5:1
We consider the following 2 categories of compression process:
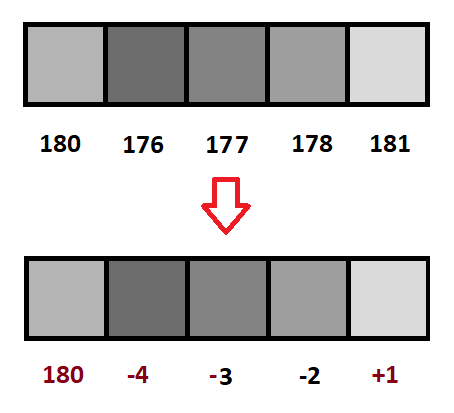
Lossless: this compression preserves the original quality because allows us to obtain a new set of data that can be reconstructed to obtain the original data.
Some image formats like PNG and GIF, use only losless compression.
We use loseless compression when approximation of the original is not allowed.
Example rewriting the pixels values to use less bits:
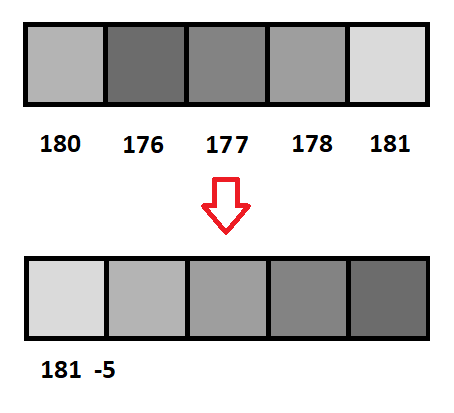
Lossy: this compression remove redundant information, uses approximation or partial discarding of the data. Some lossy image formats are JPEG, JPEG2000, MrSID.
Example rewriting the pixels values in a more convenient (lossy) way:
Tiling
The option TILED, during the creation phase of the image, with values YES (enabled) produces data stored and compressed in blocks rather than line by line.
We can configure the size of the tile with the creation option BLOCKXSIZE.
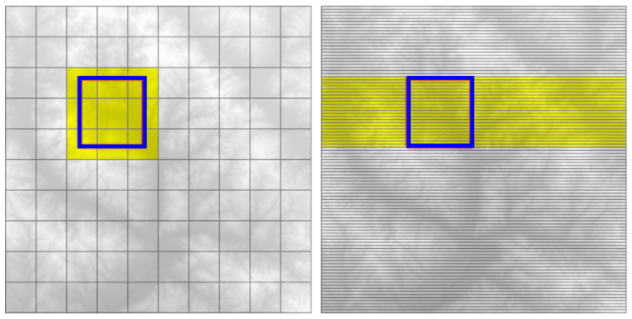
Tiling makes an important difference when a process needs to access a subset of the image.
For example in the following image if the process has to access to the area in blue, with tiled image (left side) the process needs to read just 9 tiles instead of a larger number of lines for an untiled image (right side):
Handling huge data sets
If you have really huge data sets (several gigabytes), odds are that simply adding overviews and tiles does not cut it, making intermediate resolution serving slow. This is because tiling occurs only on the native resolution levels, and intermediate overviews are too big for quick extraction.
So, what you need is a way to have tiling on intermediate levels as well. This is supported by the ImagePyramid plugin.
This plugin assumes you have create various seamless image mosaics, each for a different resolution level of the original image. In the mosaic, tiles are actual files. The whole pyramid structures looks like the following:
rootDirectory
    +- pyramid.properties
    +- 0
      +- mosaic metadata files
      +- mosaic_file_0.tiff
      +- ...
      +- mosiac_file_n.tiff
    +- 1
      +- mosaic metadata files
      +- mosaic_file_0.tiff
      +- ...
      +- mosiac_file_n.tiff
    +- ...
    +- 32
      +- mosaic metadata files
      +- mosaic_file_0.tiff
      +- ...
      +- mosiac_file_n.tiff
Creating a pyramid by hand can theoretically be done with gdal, but in practice it’s a daunting task that would require some scripting, since gdal provides no “tiler” command to extract regular tiles out of an image, nor one to create a downsampled set of tiles.